Introduction
In the previous article CORS Complete Guide (Part 1): Why CORS Error Occurs?, we understood why the browser has a same-origin policy and that the blocked cross-origin request is actually the response, not the request. After clarifying some misconceptions and having a basic understanding of CORS, we can now talk about how to solve CORS issues.
First of all, I want to let you know that the methods mentioned in this article are not complete solutions. In fact, cross-origin requests are divided into two types: simple requests and non-simple requests. The fact that “the blocked cross-origin request is actually the response, not the request” basically only applies to simple requests, and this article will only focus on “simple requests”. As for how to distinguish between simple and non-simple requests, and how to handle non-simple requests, these will be discussed in the next article.
There are actually many ways to solve basic CORS errors. Let’s first introduce a few “palliative” methods:
- Turn off the browser’s security settings.
- Set the fetch mode to no-cors.
- Do not use AJAX to fetch data.
After discussing these three methods, we will talk about the last and most correct method: “Add CORS header to the backend”.
Solution 1: Turn off the browser’s security settings
As mentioned repeatedly in the previous article, the blocked cross-origin request is due to the browser’s restrictions. Therefore, one of the ways to solve CORS issues is to simply turn off the browser’s security settings, which is simple, effective, and violent.
As for how to turn it off, if you are using Chrome, you can refer to: Run Chrome browser without CORS. For other browsers, you need to search for relevant information yourself.
After turning off the security mechanism, you can successfully get the response, and the browser will also display a prompt:
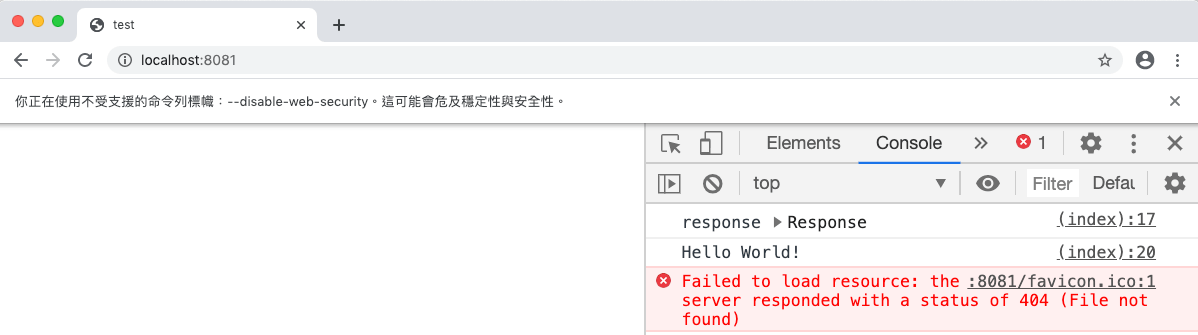
The problem is solved, but why do I say that this is a palliative method? Because it only works on your computer, and there are still problems on other people’s computers. Some people may turn off this setting for convenience during development, so they will not encounter any CORS issues. However, I think this is not a good practice because you are not only turning off CORS, but also other security mechanisms.
In short, I just want to introduce this solution to you, but I do not recommend using it.
Solution 2: Set the fetch mode to no-cors
This is definitely one of the most common mistakes made by beginners. Please pay attention.
If you are using fetch to fetch data, such as this (the origin of this webpage is http://localhost:8081, which is different from http://localhost:3000):
fetch('http://localhost:3000').then(res => {
  console.log('response', res)
  return res.text()
}).then(body => {
  console.log('body', body)
})
You will see a prominent red message on the console:
Access to fetch at ‘http://localhost:3000/‘ from origin ‘http://localhost:8081‘ has been blocked by CORS policy: No ‘Access-Control-Allow-Origin’ header is present on the requested resource. If an opaque response serves your needs, set the request’s mode to ‘no-cors’ to fetch the resource with CORS disabled.
The first half is familiar, and the second half may be a bit unfamiliar. But it doesn’t matter, we see the keyword: set the request's mode to 'no-cors'. Oh, does this mean that we can ignore CORS in this way? Let’s try it out immediately:
fetch('http://localhost:3000', {
  mode: 'no-cors'
}).then(res => {
  console.log('response', res)
  return res.text()
}).then(body => {
  console.log('body', body)
})
After changing the code and running it again, there is no error message! The console is clean, but the value printed seems strange:
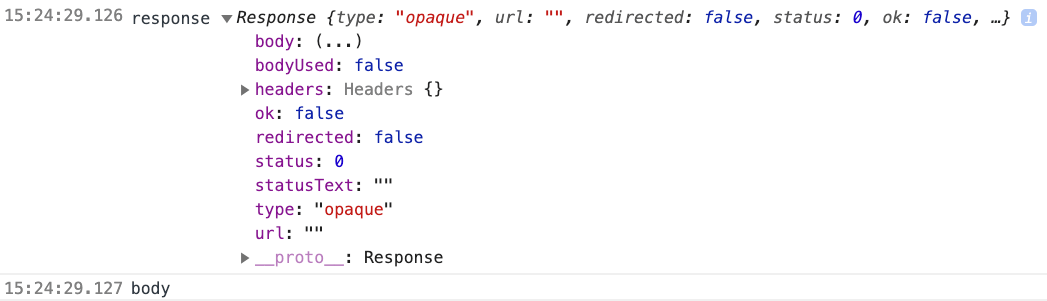
The response status is 0, the body content is empty, and the type is something called opaque, which looks strange. But if we open the devtool and switch to the Network tab, we will find that the backend actually returns a response.
Hmm, the browser clearly received the response, why is there no content in the program? Why is this happening?
This is because mode: no-cors is completely different from what you think.
When you pass in mode: no-cors, you are telling the browser: “I want to send a request to a URL without CORS headers, so please don’t give me an error.” Since this is the case, you will not see the error message No 'Access-Control-Allow-Origin' header is present on the requested resource, because you expected this to happen.
However, setting this mode does not mean that you will be able to get the response magically. In fact, it is the opposite. If you use mode: no-cors, you will definitely not get the response. Yes, you will definitely not get it, even if the backend adds the Access-Control-Allow-Origin header for you, you still won’t get the response.
After setting this mode, it does not magically allow you to bypass restrictions and get things. On the contrary, this mode is telling the browser: “I want to send a request to a resource without CORS headers, I know I won’t get a response, so you absolutely should not give me a response.”
Therefore, if you find that you have used mode: no-cors, there is a 99% chance that you have used it incorrectly and should not use it at all. If you use it, you may be confused because:
- You can see the response in the network tab.
- Your program does not generate any errors.
But you still can’t get the response, it’s empty, all because of the no-cors mode. If you use it, you may be as confused as the people in this issue. Therefore, adding this only means that you will not get an error, but it does not break the cross-origin restriction, and you still cannot get the response.
As for when to use this mode, I need to study it further. You can refer to:
Solution 3: Do not use AJAX to get data
Since using AJAX will be blocked by the cross-origin request policy, if we can get data without using AJAX, then there will be no problem, right? As we mentioned in the previous article, some tags are not subject to the same-origin policy, such as img or script…yes, script!
Generally, script is used to import code written by others, such as jQuery or other libraries. But in the era when the CORS specification was not yet complete, some people came up with the clever trick of using the script tag to pass data. I still think it’s amazing.
Simply put, it works like this. We can import other people’s scripts using the script tag, right? Suppose the script we want to import looks like this:
var data = {
  username: 'huli'
};
After we import it, can’t we directly access the data variable, which contains the data we want to get across domains? The above example is relatively simple. Let’s take a slightly more complicated example. Suppose we want to pass a userId to the server and need to get the data of this userId. Then our server can write like this:
var express = require('express');
var app = express();

// 事先準備好的資料
const users = {
  1: { name: 'user1' },
  2: { name: 'user2' },
  3: { name: 'user3' },
}

// 根據傳入的 id 回傳資料
app.get('/users/:userId', function (req, res) {
  const userId = req.params.userId;
  res.end(`var data = ${JSON.stringify(users[userId])}`);
});

app.listen(3000, function () {
  console.log('Example app listening on port 3000!');
});
If we visit http://localhost:3000/users/1, the response will be: var data = {"name":"user1"}.
Then, our frontend can write like this:
<!DOCTYPE html>

<html>
<head>
  <meta charset="utf-8">
  <script src="http://localhost:3000/users/1"></script>
  <script>
    console.log(data)
  </script>
</head>

<body>
</body>
</html>
Just import this script and print out the data, and we can see that we have successfully obtained the data! So the key point of this method is that the server generates data dynamically and outputs it in the form of JS.
However, in practice, we do not know in advance whose data we need to get, but rather we get the corresponding id data after the user performs some actions. Therefore, this script will be dynamically added, like this:
<!DOCTYPE html>

<html>
<head>
  <meta charset="utf-8">
  <script>
    function getUser(userId) {
      // 新增 script 元素
      const script = document.createElement('script')

      // 加上 src
      script.src = 'http://localhost:3000/users/' + userId

      // 插入到 body 中
      document.body.appendChild(script);

      // 印出資料
      console.log(data)
    }
  </script>
</head>

<body>
  <button onclick="getUser(1)">user1</button>
  <button onclick="getUser(2)">user2</button>
</body>
</html>
The front-end has two buttons, one for fetching user1’s data and the other for fetching user2’s data. After clicking the button, we dynamically generate a script and place it in the body. This way, when the script finishes loading, we can retrieve the data.
However, if you execute the above code, you will get an Uncaught ReferenceError: data is not defined error. This is because loading the script takes time, and we cannot retrieve the data before it finishes loading.
For asynchronous operations like this, the solution is always the same: add a callback. Instead of using a variable to store the data, it’s better to use a callback to pass the data. The backend can be changed to:
app.get('/users/:userId', function (req, res) {
  const userId = req.params.userId;
  res.end(`setData(${JSON.stringify(users[userId])})`);
});
The response you get will look like this:
setData({"name":"user1"})Basically, we just changed the variable declaration to a function parameter. And this setData is the function you need to write on the front-end to receive the data:
<!DOCTYPE html>

<html>
<head>
  <meta charset="utf-8">
  <script>
    function setData(data) {
      console.log(data)
    }
    function getUser(userId) {
      const script = document.createElement('script')
      script.src = 'http://localhost:3000/users/' + userId
      document.body.appendChild(script);
    }
  </script>
</head>

<body>
  <button onclick="getUser(1)">user1</button>
  <button onclick="getUser(2)">user2</button>
</body>
</html>
This way, when the script finishes loading, it will call the setData function and pass the data to it, and we can retrieve the data.
Finally, we can make a small improvement by not hard-coding the function name, but allowing the client to pass in the desired name:
app.get('/users/:userId', function (req, res) {
  const userId = req.params.userId;
  const callback = req.query.callback;
  res.end(`${callback}(${JSON.stringify(users[userId])})`);
});
And the front-end can pass a query string to specify the callback function name:
function setUser(data) {
  console.log(data)
}
function getUser(userId) {
  const script = document.createElement('script')
  script.src = 'http://localhost:3000/users/' + userId +
    '?callback=setUser';
  document.body.appendChild(script);
}
To summarize this method, it uses the fact that the script tag does not block cross-origin requests, allowing the server to dynamically generate the file content and pass JSON-formatted data by calling a JavaScript function.
This method is called JSONP, which stands for JSON with Padding (padding refers to the function name we added in front). It was quite common in the early days when the CORS specification was not yet complete, cleverly bypassing the browser’s security restrictions. However, its disadvantage is that since you can only call it using a script tag, you can only use the GET method, and other methods like POST, PATCH, and DELETE cannot be used.
When using $.ajax provided by jQuery, you may have noticed the JSONP parameter, which made me think they were the same thing, but jQuery just wrapped them up.
The principle of JSONP is to pass data using a script tag to bypass the CORS policy, and you need server cooperation to use it (because what it returns is actually a piece of JavaScript, not just data). Some APIs still support JSONP, such as the Twitch API.
Halftime
By now, you should have tried most of the front-end solutions, and you may have noticed that the three solutions mentioned above:
- Disabling the browser’s security settings
- Setting the fetch mode to no-cors
- Not using AJAX to retrieve data
cannot really solve the problem.
The first one only works for your own browser, the second one is just self-deception, and you still cannot get the response, and the third one requires special support from the server and has its limitations.
That’s why I said in the previous article: “In most cases, CORS is not a front-end problem, and pure front-end cannot solve it.” The browser blocks things for security reasons, so you have to let the browser know: “This is actually safe,” and then it will allow it.
For example, if you send a cross-origin request to google.com, the browser will block it for security reasons. Who can decide not to block this request? It’s not the front-end, because the front-end is the one sending the request. Therefore, the answer is naturally the backend, which is google.com. As long as google.com tells the browser: “Hey, I trust this origin, it won’t do anything bad, give him my response!” the browser will comply.
It’s like if you work in a restaurant and hear a customer say, “I know the boss,” would you immediately believe him? No, because anyone can say they know the boss, but you can’t judge whether it’s true or not. To judge the truth, you can only ask the boss. If the boss says, “Yes, I really know him,” then it’s true.
So the one who has the decision-making power is not the customer, but the boss. Sending cross-origin requests is the same. Every origin will say that it has permissions, but you can’t ask those who send the requests, you have to ask the receiving end. Ask if you are willing to give this origin permission, and if you are willing, then allow it.
Therefore, none of the three solutions mentioned above can really solve the problem.
So how do you tell the browser, “I agree”? The method may be much simpler than you think - just add a header!
The real solution: Set CORS header on the backend
Do you remember the error that occurred when you used fetch at the beginning?
Access to fetch at ‘http://localhost:3000/‘ from origin ‘http://localhost:8081‘ has been blocked by CORS policy: No ‘Access-Control-Allow-Origin’ header is present on the requested resource. If an opaque response serves your needs, set the request’s mode to ‘no-cors’ to fetch the resource with CORS disabled.
This is the part that says: No ‘Access-Control-Allow-Origin’ header is present on the requested resource.
As mentioned earlier, the backend is the one with the authority to tell the browser, “I allow this origin to access my resources across domains,” and the way to tell the browser is to add a header to the response.
The name of this header is Access-Control-Allow-Origin, and the content is the origin you want to allow, for example: Access-Control-Allow-Origin: http://localhost:8081, which allows cross-origin requests from http://localhost:8081.
What if you want to allow multiple origins? Sorry, you can’t put multiple origins in the header. You can only put one, or you can choose to put *, which means allowing any origin. If you want to target multiple origins, the server needs to do some extra processing.
Let’s first look at the case of putting *:
var express = require('express');
var app = express();

app.get('/', function (req, res) {
  res.set('Access-Control-Allow-Origin', '*');
  res.end('hello world');
});

app.listen(3000, function () {
  console.log('Example app listening on port 3000!');
});
This tells the browser, “Any origin can get my response, you don’t need to block it.” So when the front-end uses AJAX to send a request, it can get the response without any errors.
There is a common mistake here, which is that some people think that the Access-Control-Allow-Origin header is something that the front-end needs to add when sending a request. No, this is completely wrong. Adding this in the front-end is completely useless because this header only exists in the response and needs to be added by the backend. Adding it in the front-end is the same as not adding it at all.
So if you have added this in the front-end, please remove it. Once again, CORS issues cannot be solved purely by the front-end. Basically, the backend needs to be involved.
If you only want to allow specific origins, just pass in the origin you want to allow:
app.get('/', function (req, res) {
  res.set('Access-Control-Allow-Origin', 'http://localhost:8081');
  res.end('hello world');
});
It’s that simple. Just add a header to tell the browser, “I agree that this origin can get my response,” and that’s it.
This is the fundamental solution to cross-origin requests. If you have a cooperative relationship with the resource you want to access, usually just ask them to set this header. For example, if you encounter a CORS issue when connecting to the company’s backend API, just ask the backend engineer to add this header for you.
Don’t try to solve it yourself because this is not a problem that the front-end should solve. It is a problem that the backend should solve, but you need to help them and tell them how to solve it.
I emphasized one thing above, which is “you have a cooperative relationship with the resource you want to access,” but sometimes you may want to get some data in the front-end that you have no cooperative relationship with, such as calling someone else’s non-public API or fetching content from google.com, and these resources will never give you the Access-Control-Allow-Origin header.
What to do then?
Let’s welcome the proxy server!
Use a proxy server
In these articles, I keep reminding everyone that the same-origin policy and other restrictions are only “browser restrictions.” Once you leave the browser, there are no restrictions, and that’s where the proxy server comes in.
The translation of the proxy server is a proxy server. The meaning of this term may be slightly different in different situations, but the general direction is the same. Originally, you were sending data from A to B, but with a proxy, you send it from A to P (proxy server), then from P to B, and then back again. In the middle, P plays the role of “proxy.”
This is like a celebrity and their agent. The agent is responsible for external work and contacts, and then informs the celebrity. If the celebrity wants to work with someone, they also ask the agent, who then asks and tells the celebrity. So the agent is actually the “proxy” for the celebrity.
So how can we apply this concept to CORS-related issues?
If you want to access data from website A, but it does not provide the Access-Control-Allow-Origin header, you can write your own server to retrieve the data from the backend of website A and then return the data to your own frontend. Because you can control your own backend, you can add any header you want and retrieve any data you want.
The numbers in the image represent the following process:
- The browser sends a request to the proxy, requesting data from huli.tw.
- The proxy server retrieves the data from huli.tw (backend, not browser, so there is no cross-origin restriction).
- huli.tw returns the data to the proxy (same as above, no cross-origin restriction).
- The proxy returns the data to the browser, adding CORS headers (so the frontend is not blocked).
You may have heard of CORS Anywhere, which starts with the following statement:
CORS Anywhere is a NodeJS proxy which adds CORS headers to the proxied request.
It is a proxy server that adds CORS headers to the resources you want to access. Or, if you are using a plugin on Chrome to solve CORS issues, the principle behind it is simply to add the Access-Control-Allow-Origin header to the response using the plugin.
Therefore, there is no magic to solving CORS issues, whether you use a plugin or a proxy server, the principle behind it is the same, which is the Access-Control-Allow-Origin header.
However, when it comes to the proxy approach, some people may have a question:
Didn’t you say at the beginning that there would be security issues if you could access data from any website? What about the proxy server? Why is there no such restriction when using a proxy?
Let’s take a look at this comparison chart. The top part shows the process of using a proxy, while the bottom part shows the process without using one:
We first look at the bottom part. If you don’t use a proxy, there will be security issues as mentioned earlier, and the website can access data from your localhost or other websites, so the browser blocks it.
Next, let’s look at the top part. It is important to note that if you use a proxy, who is communicating with localhost:3000? It is the proxy server, so the webpage is not retrieving data from “local localhost:3000”, but from “proxy server’s localhost:3000”. Therefore, there is no security issue for your computer (but there may be for the proxy server).
Summary
In this article, we have looked at many different solutions. The most common one you should use is “ask the backend to add CORS headers”, because this is usually the most correct solution. But if you don’t have control over the backend, such as when you want to retrieve data from an unfamiliar source, you may want to set up a proxy server yourself or find an existing one to add CORS headers for you.
Many people used to use CORS Anywhere, but starting from February 2021, this service will be subject to many restrictions due to various factors, because it was not originally intended to be used as a proxy service, but as a demo for the CORS anywhere project. For more information, please refer to: PSA: Public demo server (cors-anywhere.herokuapp.com) will be very limited by January 2021, 31st #301
If the backend API only provides JSONP, you can also use JSONP. If you find CORS annoying when testing things on your own computer, you can install an extension to solve the problem, but be aware that this only works on your own computer and will not work on another computer.
There is no one solution that is always right or wrong, as different situations may require different approaches. However, I say “asking the backend to add CORS headers is usually the most correct solution” because most people who encounter cross-origin request issues may be at work. If both the frontend and backend have experience, adding a header will solve the problem, but if both sides are inexperienced, they may take a detour and have the frontend set up a proxy server, which is the consequence of not being familiar with this topic.
Or some people may start to study how to “solve cross-origin problems through pure front-end”, and after a big circle, they find that neither this nor that works, and even the seemingly most promising mode: no-cors doesn’t work. After reading this article, you will understand that this is not something that the front-end should solve, so you naturally cannot solve it through pure front-end.
Can CORS issues be completely resolved after reading this article? Not necessarily.
This article only deals with the “simplest situation”. There are still several situations that we have not mentioned, such as the most common:
- Non-simple requests (using other HTTP methods and custom headers)
- Sending cookies (how to make cross-origin requests also support cookies)
These will be explained in the next article: CORS Complete Manual (3): CORS Details.
Comments