Preface
Note: Currently, this blog has problems supporting JSX syntax, so it may not be easy to read the code. I will fix it as soon as possible.
This title pays tribute to a series of books that people who write JavaScript have heard of even if they haven’t read them: You Don’t Know JS by Kyle Simpson. It talks about many things about JS that many people don’t know.
And I don’t know React is a series of records I made for myself, recording some React that I don’t know, and these articles are summarized from my experience using React. Some of the errors I have encountered may be very basic and common (just like those written in the official documents, but I didn’t read them carefully, so I don’t know), and some may be relatively rare (I may encounter them only after writing for three or four years at work).
In other words, the spirit of writing this series is different from YDKJS. The former wants to tell you some things about JS that few people know, and it feels like “I will teach you how to write JS”. The reason why I wrote this series called “I don’t know” is because I want to use a series of articles to record the misunderstandings or omissions I have encountered when writing React, and what is the correct answer.
I don’t know how many articles this series will have. I will post an article every time I make a mistake. There is a big difference in this series that I think is quite large. I will try to provide the scene where the mistake was made at the beginning of the article, so that everyone has the opportunity to debug before seeing the answer and see if they can find out where the error is. I think this is actually the most essential part. This is not a standardized interview question, nor is it a React quiz randomly found on the Internet, but a real situation I have encountered at work.
Because I want everyone to immerse themselves in the situation as much as possible and think about the problems I have encountered, there will be a lot of space for “defining and reproducing problems”. If you are not interested in finding answers yourself, you can also skip this part and go directly to see the answer. But I personally recommend that you try to debug it yourself first, find out where the problem is, and then come to see the answer in the article, so that you can fully absorb what the article wants to express.
Anyway, let’s take a look at the case we want to talk about in this article!
Reproducing the actual case
This time we want to demo the Snackbar component, which is a small and cute component that appears at the bottom of the screen to prompt the user. Our task is very simple, just write a Snackbar and let it work normally. Because the focus here is not on style, so I will write the style part casually, just for demonstration.
We can first write a basic skeleton, use the open props to determine the transparency, and can accept the children passed in and render it out:
function Snackbar({ children, open }) {
return (
<div
style={{
background: "black",
color: "white",
transition: "all 0.3s",
opacity: open ? 1 : 0
}}
>
{children}
</div>
);
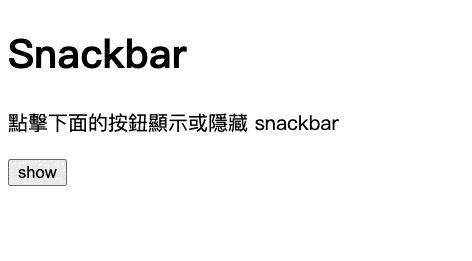
}When open is true, you can see the content, like this:

So why do we do this? Because based on the adjustment of this transparency, we can write another component that will automatically hide, and use transition to achieve the fade-in and fade-out effects:
const duration = 1000;
const transitionDuration = 300;

function AutoHideSnackbar({ children, onClose }) {
  const [open, setOpen] = useState(false);
  useEffect(() => {
    setOpen(true);
    const timer = setTimeout(() => {
      setOpen(false);
    }, duration);

    const timer2 = setTimeout(() => {
      onClose();
    }, duration + transitionDuration);
    return () => {
      clearTimeout(timer);
      clearTimeout(timer2);
    };
  }, [onClose]);
  return <Snackbar open={open}>{children}</Snackbar>;
}
When using it, you need to use it like this:
export default function App() {
  const [open, setOpen] = useState(false);

  const handleClick = () => setOpen(true);
  const handleClose = () => setOpen(false);

  return (
    <div className="App">
      <h1>Snackbar</h1>
      <button onClick={handleClick}>show</button>
      {open && (
        <AutoHideSnackbar onClose={handleClose}>hello~</AutoHideSnackbar>
      )}
    </div>
  );
}
When we click the button, the open of this layer will be set to true, and then render the <AutoHideSnackbar> component. The initial value of open in AutoHideSnackbar is false, so it will render <Snackbar open={false}>hello</Snackbar>, and then the transparency of Snackbar will be 0, in an invisible state.
After rendering and mounting, execute the useEffect inside AutoHideSnackbar, set open to true, and then the transparency of Snackbar will change to 1. Because it changes from 0 to 1 and has a transition, it achieves the effect of fade in, and set two timers to handle automatic closing.
After one second, the first timer is triggered, set open to false, and then trigger the transition again, achieving the effect of fade out. After the transition ends, the second timer is triggered, calling onClose, and then calling handleClose of App, setting the open of the App layer to false, so AutoHideSnackbar is unmounted and restored to its original state.
To this point, an auto-hide Snackbar has been created, but there is still room for improvement.
When using Ant Design, I was deeply influenced by a usage that renders components using function calls instead of using render. For example, if you want to display a message, you can do it like this:
import { message } from 'antd'

export default function App() {
  const handleClick = () => {
    message.info("hello~")
  }

  return (
    <div>
      <button onClick={handleClick}>顯示訊息</button>
    </div>
  )
}
Instead of like this (Antd doesn’t have this usage, it’s just an example):
import { Message } from 'antd'

export default function App() {
  const [open, setOpen] = useState(false)
  const handleClick = () => {
    setOpen(true)
  }

  const handleClose = () => {
    setOpen(false)
  }

  return (
    <div>
      <button onClick={handleClick}>顯示訊息</button>
      <Message open={open} onClose={handleClose}>
        hello~
      </Message>
    </div>
  );
}
It can be seen that the former usage is much simpler than the latter, because the latter must manage the opening or closing state of the component itself, but the former completely ignores these. Although it is more convenient, I would say that the former is “less React” because the spirit of React is originally centered around state, and UI is only a byproduct of state, so the opening or closing state should be in the state.
However, despite this, I still prefer the former usage, because when we are displaying a message, we actually don’t care whether it is open or closed. We don’t want to know this, and all we want to do is “display the message”, so if we can use a function call like alert or confirm, things will be much simpler.
So next, let’s refer to the source code of Ant Design and give our Snackbar a static method to make it easier to display messages.
The code will be like this:
Snackbar.show = function (children) {
  const div = document.createElement("div");
  document.body.appendChild(div);
  ReactDOM.render(
    <AutoHideSnackbar
      onClose={() => {
        const unmountResult = ReactDOM.unmountComponentAtNode(div);
        if (unmountResult && div.parentNode) {
          div.parentNode.removeChild(div);
        }
      }}
    >
      {children}
    </AutoHideSnackbar>,
    div
  );
};
Actually, it dynamically generates a div when calling the function, and then uses ReactDOM.render to render the AutoHideSnackbar, and removes the div when it disappears automatically. Through this way, we can create a new React App to render the Snackbar, apart from the original React App.
And because the parameter children we receive is not limited, it is also possible to display images, like this:
import React from "react";
import { Snackbar } from "./Snackbar";
import styled from "styled-components";
import warningSvg from "./icon.svg";
import SVG from "react-inlinesvg";
const Warning = styled(SVG).attrs({
src: warningSvg
})`
width: 24px;
height: 24px;
`;
export default function App() {
const showSnackbar = () => {
Snackbar.show(
<div>
hey! <Warning />
</div>
);
};
return (
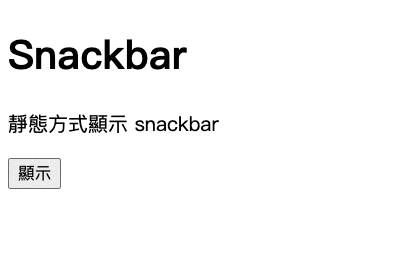
<div className="App">
<h1>Snackbar</h1>
<p>靜態方式顯示 snackbar</p>
<button onClick={showSnackbar}>顯示</button>
</div>
);
}The result is:
Okay, everything looks perfect, and now we can finally display things with a simple function call, without having to maintain those troublesome states…
Until you take a closer look and find something strange, that is, when you use the static method of the Snackbar, the fade in disappears! You can see from the gif above that there is only a fade out effect, but no fade in effect.
This is a bug I encountered before, and it is the protagonist of this article.
Below is the CodeSandbox that can fully reproduce this bug and the component made above. I recommend that you fork it and try to find out where the bug is and what the root cause is, and train your debugging skills.
CodeSandbox: https://codesandbox.io/s/snackbar-debug-test-kw7iv?file=/src/App.js
One thing to note is that the above code does have a bug, and the judgments I made about the cause may not be correct. This was my first judgment when I first encountered this bug, and it may be correct or incorrect. Now you have the code that can fully reproduce the problem, so you can find the problem yourself using various methods.
Next, I will remind you that the problem is really in the static method usage, and then I will start talking about what the answer is. If you want to debug it yourself, please do not continue reading, as it may spoil the answer.
Anti-spoiler line~
Anti-spoiler line~
Anti-spoiler line~
Anti-spoiler line~
Anti-spoiler line~
Anti-spoiler line~
Anti-spoiler line~
Anti-spoiler line~
Anti-spoiler line~
Anti-spoiler line~
How did I debug it?
Since the problem is in the static method usage, I decided to investigate in this direction. The first thing I did was to add console.log to the render and useEffect of each component, and compare what was logged with my own understanding to see if there were any differences in the execution order.
After some time of trying, I found that there didn’t seem to be any difference, and no matter which method was used, the execution flow was the same as what I knew. When AutoHideSnackbar was first rendered, open was always 0, so it was not visible at first, and then after useEffect, it became 1, so the opacity became 1, resulting in a fade in effect.
But in the end, when the fade-in transition disappeared, it meant that when it appeared on the screen, open should be 1, otherwise we wouldn’t see this result.
After debugging for a while without any clues, I began to suspect that it might be due to some asynchronous or React rendering mechanism that caused open to be true during the first render. So I added an rAF to delay the open attribute from becoming true:
export function AutoHideSnackbar({ children, onClose }) {
  const [open, setOpen] = useState(false);
  useEffect(() => {
    // 原本是直接 setOpen(true),我包了 rAF 在外面
    window.requestAnimationFrame(() => setOpen(true));
    const timer = setTimeout(() => {
      setOpen(false);
    }, duration);

    const timer2 = setTimeout(() => {
      onClose();
    }, duration + transitionDuration);
    return () => {
      clearTimeout(timer);
      clearTimeout(timer2);
    };
  }, [onClose]);
  return <Snackbar open={open}>{children}</Snackbar>;
}
After adding it, I found that there was no problem and I could successfully see the fade-in effect. However, even so, I still didn’t know why it happened in the first place.
Then I tested it again and found a very serious problem!
I didn’t handle the experimental variables properly. I always thought that it was because of the tricky method I used that caused this problem, so I kept looking in that direction to find the answer and see what was different between the static method and the normal render. However, I ignored the fact that there was another variable in the example above, which was whether to render SVG. When I removed the SVG from the static method example, I found that there was a fade-in effect!
Damn it, I spent two or three hours doing nothing but looking in the wrong direction, and it was still because I missed something and didn’t define the problem scope properly. After knowing this, the progress became much faster.
First, I replaced the react-inlinesvg library with a normal img tag and found that it still worked properly, and the fade-in effect disappeared when I added the react-inlinesvg to the normal render method. Therefore, the reason was almost certain to be caused by the react-inlinesvg library.
But why exactly? I looked at its source code and didn’t see anything suspicious. In the absence of other methods, I used the most violent but also the most effective method: “changing the code in node_modules”. This is actually similar to my usual debugging method. When you are helpless and have no idea where the problem is, you start deleting code.
If you delete a section and the problem still exists, it means that the code is not the culprit. If the problem disappears after deleting a certain section of code, you know that it must be related to that section of code, which is a bit like binary search on the code. If you are familiar with the execution process, it is actually quite fast to do, just keep deleting code. However, the trouble with doing this to third-party libraries is that you have to directly modify the code in node_modules, and those codes are transpiled by bable, so the readability is lower, but you can still understand it.
After deleting and modifying for a while, I finally found the problematic place here: https://github.com/gilbarbara/react-inlinesvg/blob/v2.1.1/src/index.tsx#L209
When the SVG component is mounted, it will call this.load() in componentDidMount, and this.load will call this.setState(). After several tests, I found that commenting out this.setState() would solve the problem, so I can infer that the problem should be here.
Then I suddenly remembered that I had seen something about what would happen when setState was called in componentDidMount in the official documentation before, so I Googled “componentDidMount setState” and found many related examples.
To make sure I didn’t find the wrong place, I wrote a simple component myself, added this.setState in componentDidMount, and let the Snackbar render it. I did reproduce the same problem, which was that the fade-in effect disappeared.
The code would look like this:
class Comp extends React.Component {
  componentDidMount() {
    this.setState({
      a: 1
    });
  }

  render() {
    return <div>hello</div>;
  }
}

// render 的時候
<AutoHideSnackbar onClose={handleClose}>
    <Comp />
</AutoHideSnackbar>
After going through many difficulties, the cause of the problem was finally found, which was that calling setState in componentDidMount would cause some unexpected consequences.
But what exactly are these unexpected consequences?
Check the official documentation
Just by using the very straightforward keywords “componentdidmount setstate”, you can find a lot of information, such as what I have seen before: Some Good Habits for Writing React - Lifecycle Method and State Management, or the main topic of this article: Official Documentation.
The content of the file is written as follows:
You may call setState() immediately in componentDidMount(). It will trigger an extra rendering, but it will happen before the browser updates the screen. This guarantees that even though the render() will be called twice in this case, the user won’t see the intermediate state.
If you call setState synchronously in componentDidMount, it will immediately trigger a second render, and it will happen before the browser updates the screen. Therefore, the user won’t see the result of the first render, only the second one.
This explains why our fade-in feature is broken.
Assuming our code looks like this (CodeSandbox example):
class Comp extends React.Component {
  componentDidMount() {
    console.log("Comp componentDidMount");
    this.setState({
      a: 1
    });
  }

  render() {
    console.log("Comp render");
    return <div>hello</div>;
  }
}

export function Snackbar({ children, open }) {
  console.log("Snackbar render:", { open });
  return (
    <div
      style={{
        background: "black",
        color: "white",
        transition: "all 0.3s",
        opacity: open ? 1 : 0
      }}
    >
      {children}
    </div>
  );
}

export function AutoHideSnackbar({ children, onClose }) {
  const [open, setOpen] = useState(false);
  console.log("AutoHideSnackbar render:", { open });
  useEffect(() => {
    console.log("AutoHideSnackbar useEffect");
    setOpen(true);
    const timer = setTimeout(() => {
      setOpen(false);
    }, duration);

    const timer2 = setTimeout(() => {
      onClose();
    }, duration + transitionDuration);
    return () => {
      clearTimeout(timer);
      clearTimeout(timer2);
    };
  }, [onClose]);
  return <Snackbar open={open}>{children}</Snackbar>;
}
We can determine the execution order by observing the log, which looks like this:
- AutoHideSnackbar render: {open: false}
- Snackbar render: {open: false}
- Comp render
- Comp componentDidMount
- AutoHideSnackbar useEffect
- AutoHideSnackbar render: {open: true}
- Snackbar render: {open: true}
- Comp render
It can be seen that there are a total of two renders. The first one is:
- AutoHideSnackbar render: {open: false}
- Snackbar render: {open: false}
- Comp render
- Comp componentDidMount
- AutoHideSnackbar useEffect
During the first render, Snackbar’s open is false, so the opacity is 0. Then, its children, Comp, are rendered. After rendering, Comp’s componentDidMount executes setState. Because it is executed here, according to the documentation, the user won’t see the result of the first render.
After Comp’s didMount, AutoHideSnackbar’s useEffect is executed, which sets open to true.
One thing worth noting here is that React’s official website states:
The function passed to useEffect will run after the render is committed to the screen.
It seems that “after the render is committed to the screen” is correct in most cases, and useEffect will be executed after the browser updates the screen (render is committed to the screen can be understood in this way?). However, if there is a class component below and synchronous setState is performed in componentDidMount, it will not be like this. It cannot be guaranteed that the user has seen the last render when useEffect is executed.
After this is executed, the second render will be executed:
- AutoHideSnackbar render: {open: true}
- Snackbar render: {open: true}
- Comp render
In the second render, the opacity will be 1, and according to the official documentation, the user won’t see the result of the first render, so the opacity will be 1 when it first appears on the screen, and the fade-in effect will naturally disappear.
Postscript
Although the above behavior has been explained, I still couldn’t figure out one thing at first, that is, since componentDidMount means that something has been placed on the DOM, won’t the user always see it? How can you “mount but not let the user see the result”?
Later, I went to Twitter to ask, and thanks to Chen Guanlin’s answer, I directly broke through the blind spot:
Updating the DOM and updating the screen are two different things. The pixel pipeline waits for all JavaScript to finish running before rendering. For example, if you use a for loop to update the DOM many times, only the final result will be displayed on the screen.
After reading this, I realized that updating the DOM and updating the screen are two different things. Updating the DOM does not mean that the browser will immediately paint the changes. Therefore, it is possible to update the DOM twice in one cycle, and the first result will not be displayed on the screen, only the second one will.
Before encountering these React problems, I always thought that I had a certain level of understanding of React or how the DOM works. However, I was repeatedly struck by the fact that I had overlooked many important parts. Every time I write about it, I feel like saying, “Am I really so unfamiliar with React?”.
But there is no other way. Whenever I encounter something I don’t know, I learn it. After encountering more problems, I will also know more solutions, and I will gradually understand these operating mechanisms.
The above is the first article of “I don’t know React”. I spent a morning on it and even went to ask my colleagues. At first, I was always entangled in the problems caused by the static method, and I went in the wrong direction until I suddenly realized that the difference was not there, but in the things rendered.
Once the cause of the problem is correctly identified during debugging, finding a solution is usually not far away, and you will know how to search for keywords. Because this experience also reminded me that when debugging, remember to clean up unrelated things so that you can truly confirm the root cause of the problem.
Comments