Introduction
I came across an article on Hacker News about Payment Request API — Now Being Implemented in All Major Browsers, which means that Payment Request API will be implemented in mainstream browsers.
Before that, I had never heard of it and had no idea what it was doing. But after a little research, I found out that it is the future of web payment interface.
Introduction to Payment Request API
Before understanding a new thing, I usually start with the “purpose”. If you know what this thing is born to solve, you can have the most basic understanding of it.
The reason for the birth of Payment Request API is simple, it is to solve the payment problem, especially on mobile devices.
Let’s not talk about mobile devices first, let’s talk about payment on computers.
Now every shopping website has different payment interfaces, connected to different payment service providers. Suppose I bought “Critique of Pure Reason” on Shopee, filled in my credit card number and shipping address, and Shopee kindly remembered it for me, so the next time I shop, I don’t have to fill in the shipping address again.
However, if today a PChome merchant spends money to promote various discounts, and I decide to shop on PChome, I will have to fill in my credit card number and shipping address again for “The Interpretation of Dreams”.
What is the problem?
The problem is that the checkout process and interface of each company and website are different, although they are similar, but those data cannot be shared. Even if I fill in the shipping address on 100 websites, I still have to fill it in again on the 101st website because they don’t have my data.
Is there anything in common with the above?
Yes, you are using the same browser to shop.
Browser’s First Attempt: Auto-fill
The scenario mentioned above is not accurate because you should find that the browser will automatically remember your address and credit card, so you can easily use the auto-fill function.
For example, when swiping a card, as long as you swipe it once, Chrome can remember the card information in the browser. The next time you swipe a card on another website, you only need to click on the input box of the card number, and Chrome will prompt you to use the previous card to pay.
The same goes for addresses, which are remembered by the browser, so you only need to fill them in once, and Chrome will automatically fill them in for you in the future.
However, there is still a problem, that is, the checkout process and interface are still not unified, and everyone has their own different implementations, and some payment interfaces are simply unbearable, especially on mobile devices!
According to Google’s statistics, 65.9% of users leave before completing all the processes when shopping on mobile devices. This has exceeded half of the users, indicating that many websites still have a lot of room for improvement in the mobile payment interface.
This time, the browser decided to jump down and solve this problem by itself.
Browser: Leave it to me!
How does the browser solve this pain point?
Simple! Just let the browser provide a unified checkout interface, and even the process is unified. The merchant’s webpage can bring in different parameters according to different needs, but in the end, it calls the API provided by the browser (that is, our protagonist today: Payment Request API) to call up the native interface of the browser.
When this API becomes popular and everyone finds it easier to use, all websites will follow suit and adopt the same method. This ensures that the payment process of all websites is unified.
So what is Payment Request API?
Simply put, it is an API provided by the browser. When the webpage calls it with JavaScript, the native checkout interface of the browser will appear, which is used to replace the original checkout process of the merchant.
You can understand it directly by looking at a picture:

This is what it looks like after calling the API.
One thing to note is that the Payment Request API is “completely unrelated” to the backend, and the backend can receive data as usual. The difference is in the frontend, where the checkout pages that you used to write can now be rendered by the browser’s native UI, and you only need to call the Payment Request API.
After calling the API, you can obtain the data filled in by the user and send it to the server as before.
However, it should be noted that this API is not yet widely used. According to the data from caniuse.com, only Chrome 61, Edge 15, and Opera 48 or above support it, and other browsers still need to wait.
Usage Process
After saying so much, let’s actually run the process!
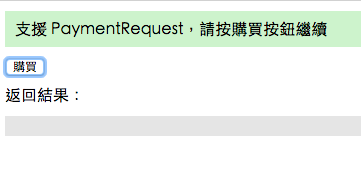
First, we create a simple demo page to detect whether Payment Request is supported and place the purchase button and return results:
Step 1: Create Payment Request Object
PaymentRequest accepts three parameters: payment method, transaction information, and others.
var request = new PaymentRequest(
  methodData, // Supported payment methods
  details,    // Detailed transaction information
  options     // Others, such as shipping methods, etc.
);
First, we implement a simple function to return the created PaymentRequest:
function createPaymentRequest () {
  var methodData = [{
    supportedMethods: ['basic-card'], // Support credit card
    data: { // Specify more detailed information
      supportedNetworks: ['jcb', 'mastercard', 'visa'],
      supportedTypes: ['debit', 'credit', 'prepaid']
    },
  }];
  var details = {
    displayItems: [ // Purchased items
      {
        label: "TechBridge Weekly Professional Edition for one year",
        amount: { currency: "TWD", value : "3000.00" }
      },
      {
        label: "Early bird discount",
        amount: { currency: "TWD", value : "-300.00" }
      }
    ],
    total:  {
      label: "Total",
      amount: { currency: "TWD", value : "2700.00" }
    }
  };

  return new PaymentRequest(methodData, details);
}
One thing to note here is that the total amount in total will not be automatically calculated by the system, so even if the sum above is 2700, you can enter other numbers.
Another condition is that this API does not support refunds, so the total must be positive. However, each item can be negative, so you can put some discount-related things.
Step 2: Call the API and Display the Checkout Page
After creating the PaymentRequest, you can use .show() to display the checkout UI, which will return a Promise. After using it, you can obtain the relevant information of the user. We will perform the checkout process after clicking the purchase button.
function onClick () {
  var request = createPaymentRequest();
  request.show().then(function(PaymentResponse) {
    handleResponse(PaymentResponse);
  }).catch(function(err) {
    console.log(err);
  });
}
Step 3: Process Data and Return Results
The last step is to process the data obtained from the previous step, send that information to the server to complete the checkout process, and return the result to display success or failure on the UI. Since this is just an example, we will skip the above steps and directly convert the data obtained from the previous step into JSON to display it.
function showResponse (response) {
  $res.innerHTML = JSON.stringify(response, undefined, 2);
}

function handleResponse (paymentResponse) {
  // You can return the result to the server here
  // This is just an example, so we will display the data directly
  showResponse(paymentResponse);

  // Simulate API delay
  setTimeout(function () {
    // Checkout successful
    paymentResponse.complete("success");
  }, 2000);
}
(The card number here is randomly generated from http://www.getcreditcardnumbers.com/)
With just the simple three steps above, you can obtain user data and complete the checkout process. The advantage of using the Payment Request API over the proprietary checkout process built by each website is that it can provide users with a native checkout experience, thereby increasing conversion rates.
The most important part of the above three steps is the part where the input parameters are passed in. There are many details that can be adjusted here, such as currency type, shipping address requirements, and whether to accept or reject based on the address selected by the user (for example, if you do not accept delivery to foreign countries, you can judge it there).
Payment methods can also specify certain credit cards or even decide whether to support debit cards.
If you are interested in these details, you can refer to the very detailed tutorial provided by Google: Deep Dive into the Payment Request API.
Native Checkout UI
If you want to run the checkout process yourself, you can go directly to the demo webpage to try it out.
Here, I will directly show you the checkout process on the computer and mobile phone by taking screenshots.
Computer
Screen after clicking the button:
Click into the order summary:
Add credit card:
Add address:
After clicking pay, enter the last three digits:
Checkout failed: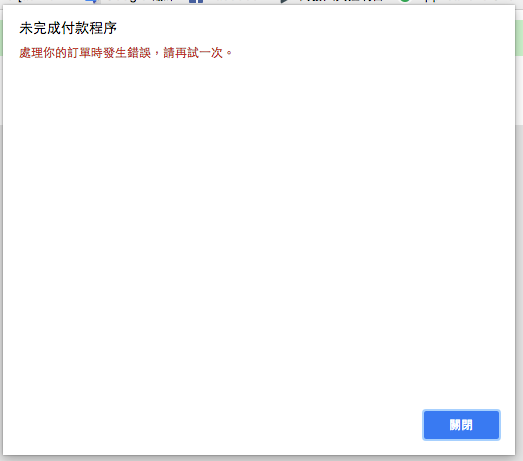
Mobile
Screen after clicking the button: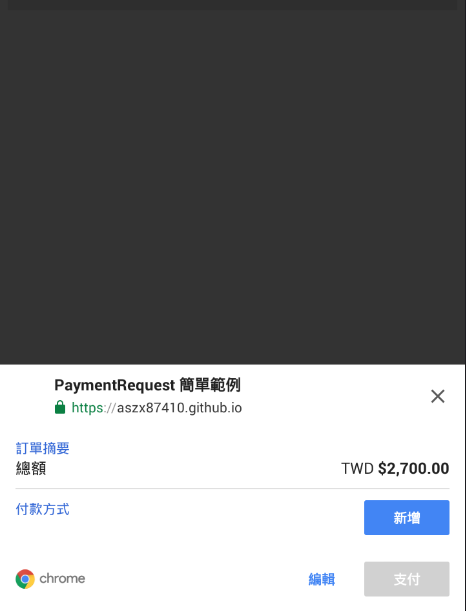
Click into order summary:
Add credit card:
Add address:
Checkout failed:
Summary
Payment Request API is being implemented by other browsers (such as Safari), and it can be expected to be widely supported in the future.
In fact, the foreign payment processor Stripe already supports the use of Payment Request API. The PaymentRequest Sample website also provides more diverse examples.
The main purpose of this article is to introduce this new standard to everyone. If you are interested in further research, there are many related resources attached below.
References:
Comments